How to Import a QTI File into Canvas Question Bank
Automated Transfer Method
PlusMind AI provides a Chrome extension to transfer Quizzes to Canvas LMS.
Manual Transfer Method
This article will guide you through importing your QTI zip file into Canvas. Note that this article won't cover the process of creating a QTI file using PlusMind AI. For that, refer to PlusMindAI FAQ. Let's dive in.
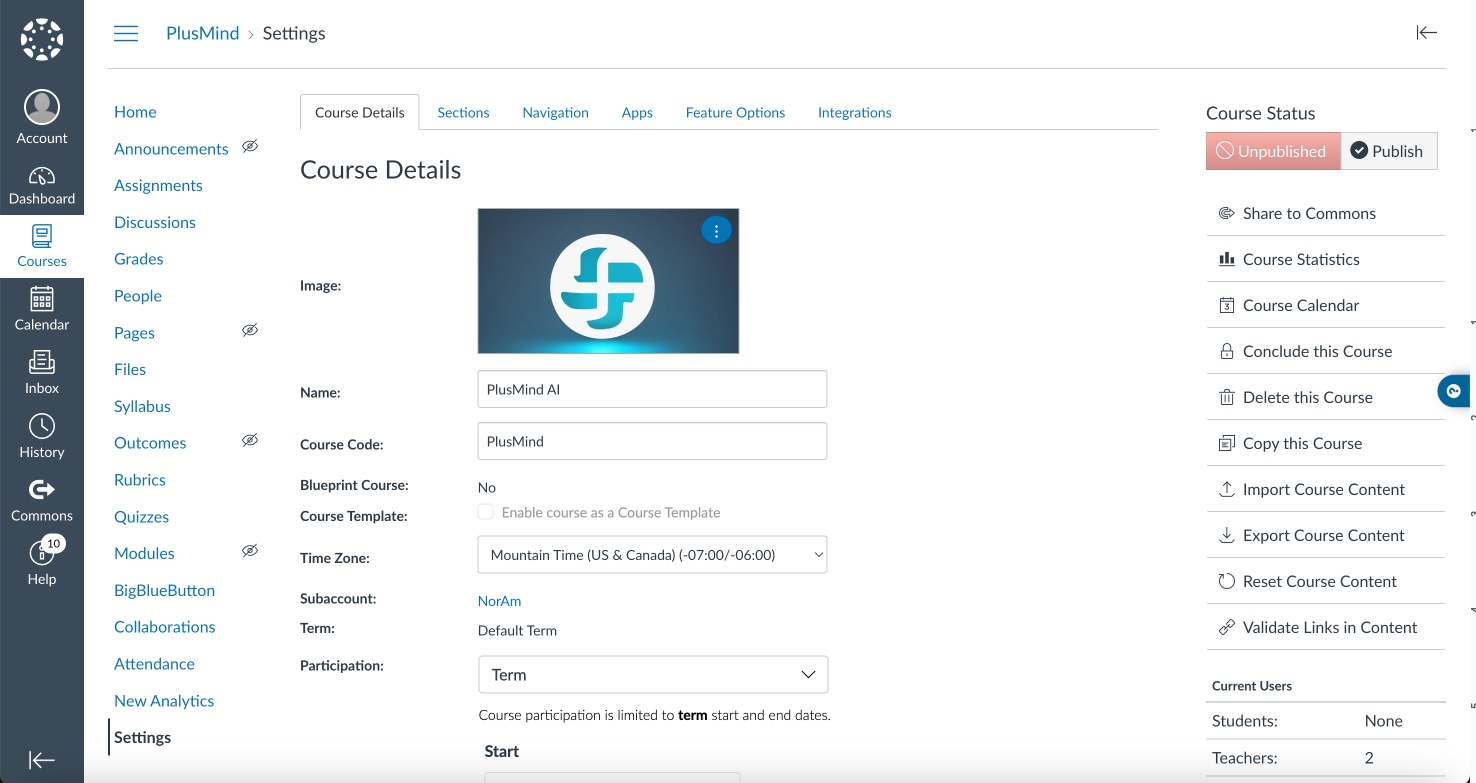
Step 1: Navigate to the Settings Page
- Go to the homepage of your Canvas course.
-
On the left menu sidebar, scroll to the bottom and click on "Settings."
-
Once on the Settings page, click "Import Course Content" found on the top
right.
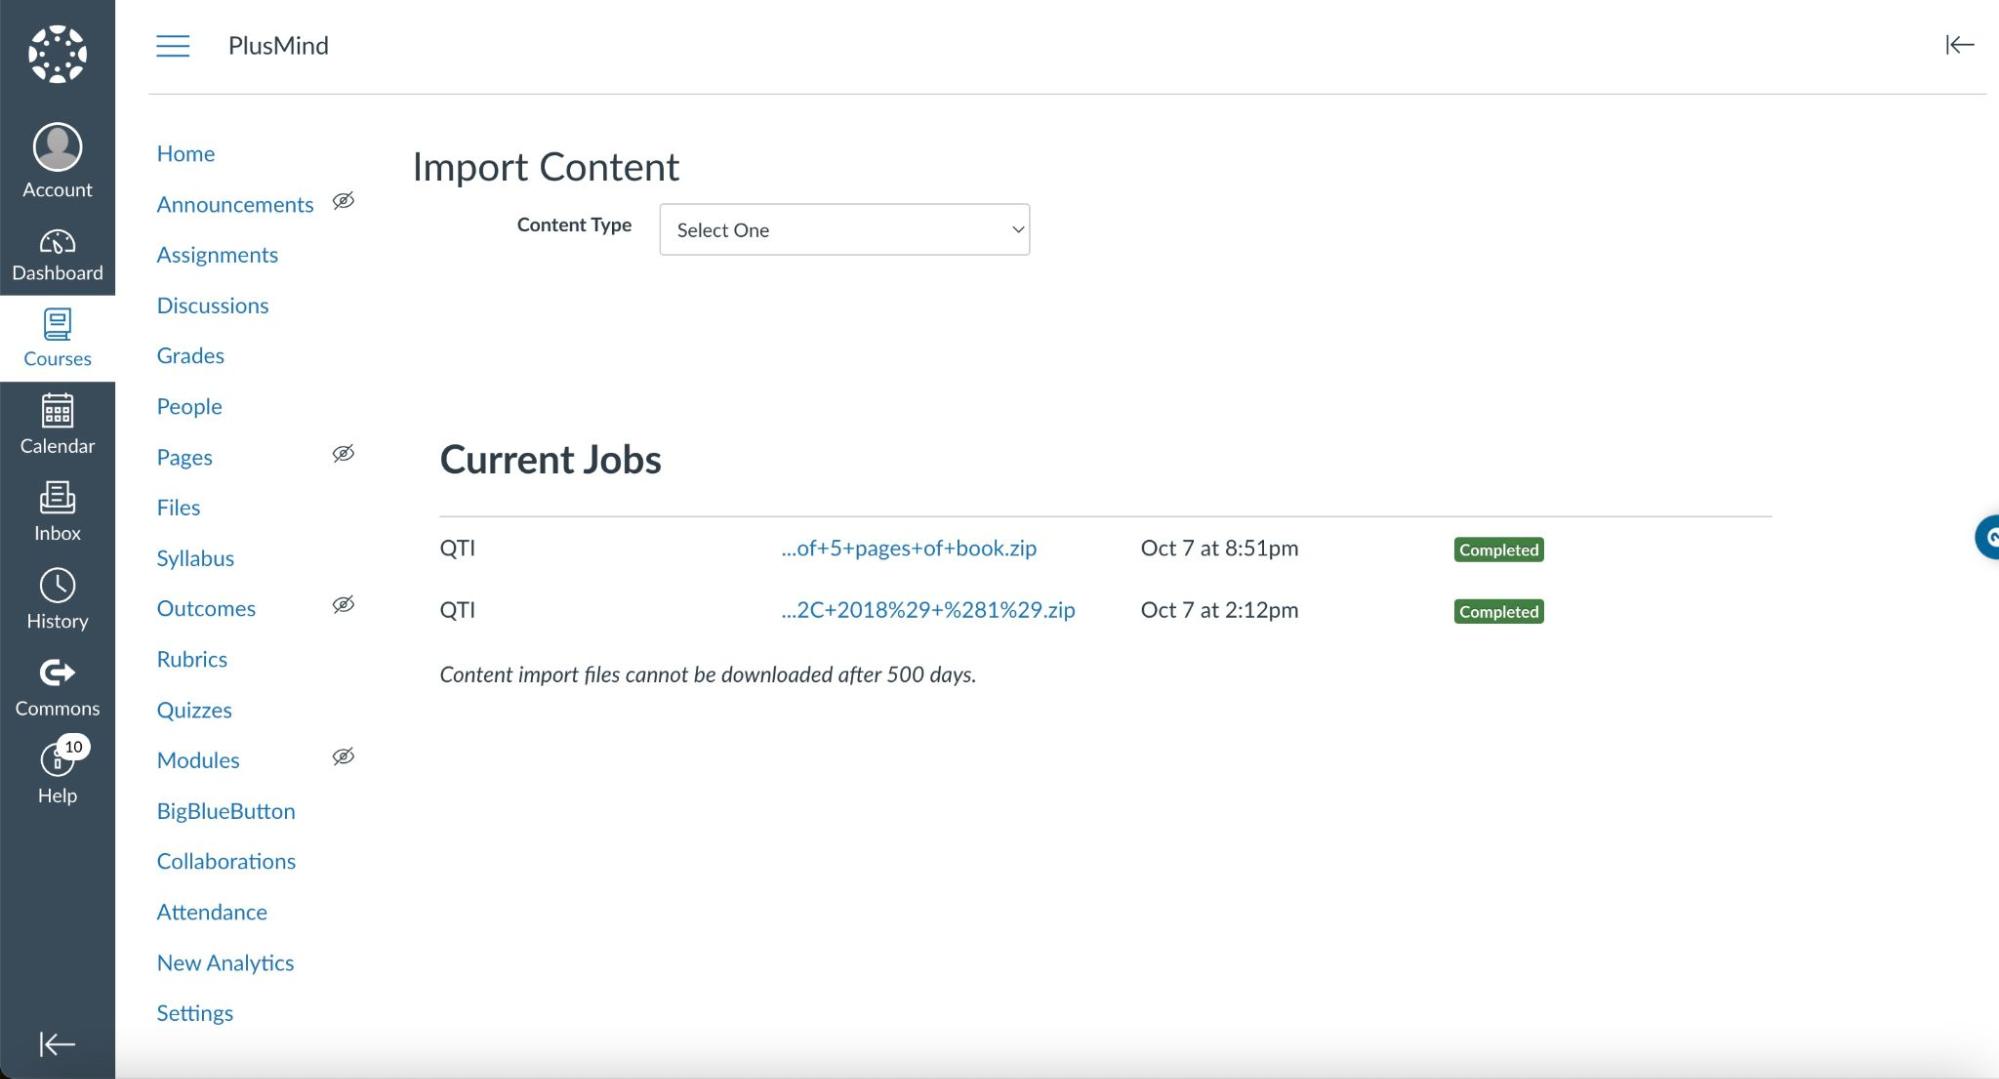
Step 2: Choose the QTI .zip File as Your Content Type
- On the Import Content page, locate the Content Type drop-down menu.
-
Select "QTI .zip file." You should now see the form for the next step.
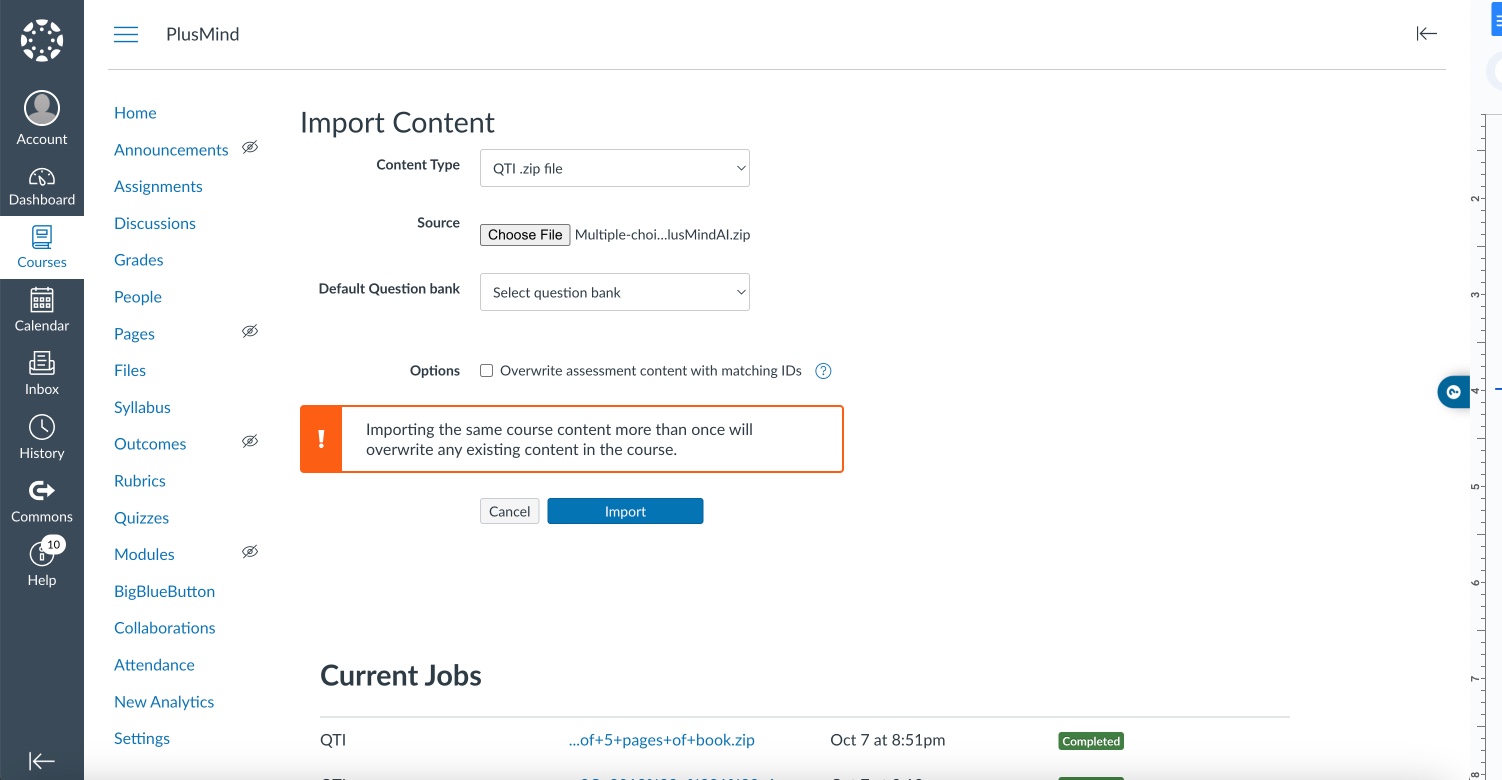
Step 3: Upload Your QTI .zip File
- Click the "browse" button.
- Locate and select your QTI .zip file, typically in your downloads folder.
-
It's crucial not to select "Default question bank" or "Overwrite
assessment content with matching IDs." Leave these fields as they are.
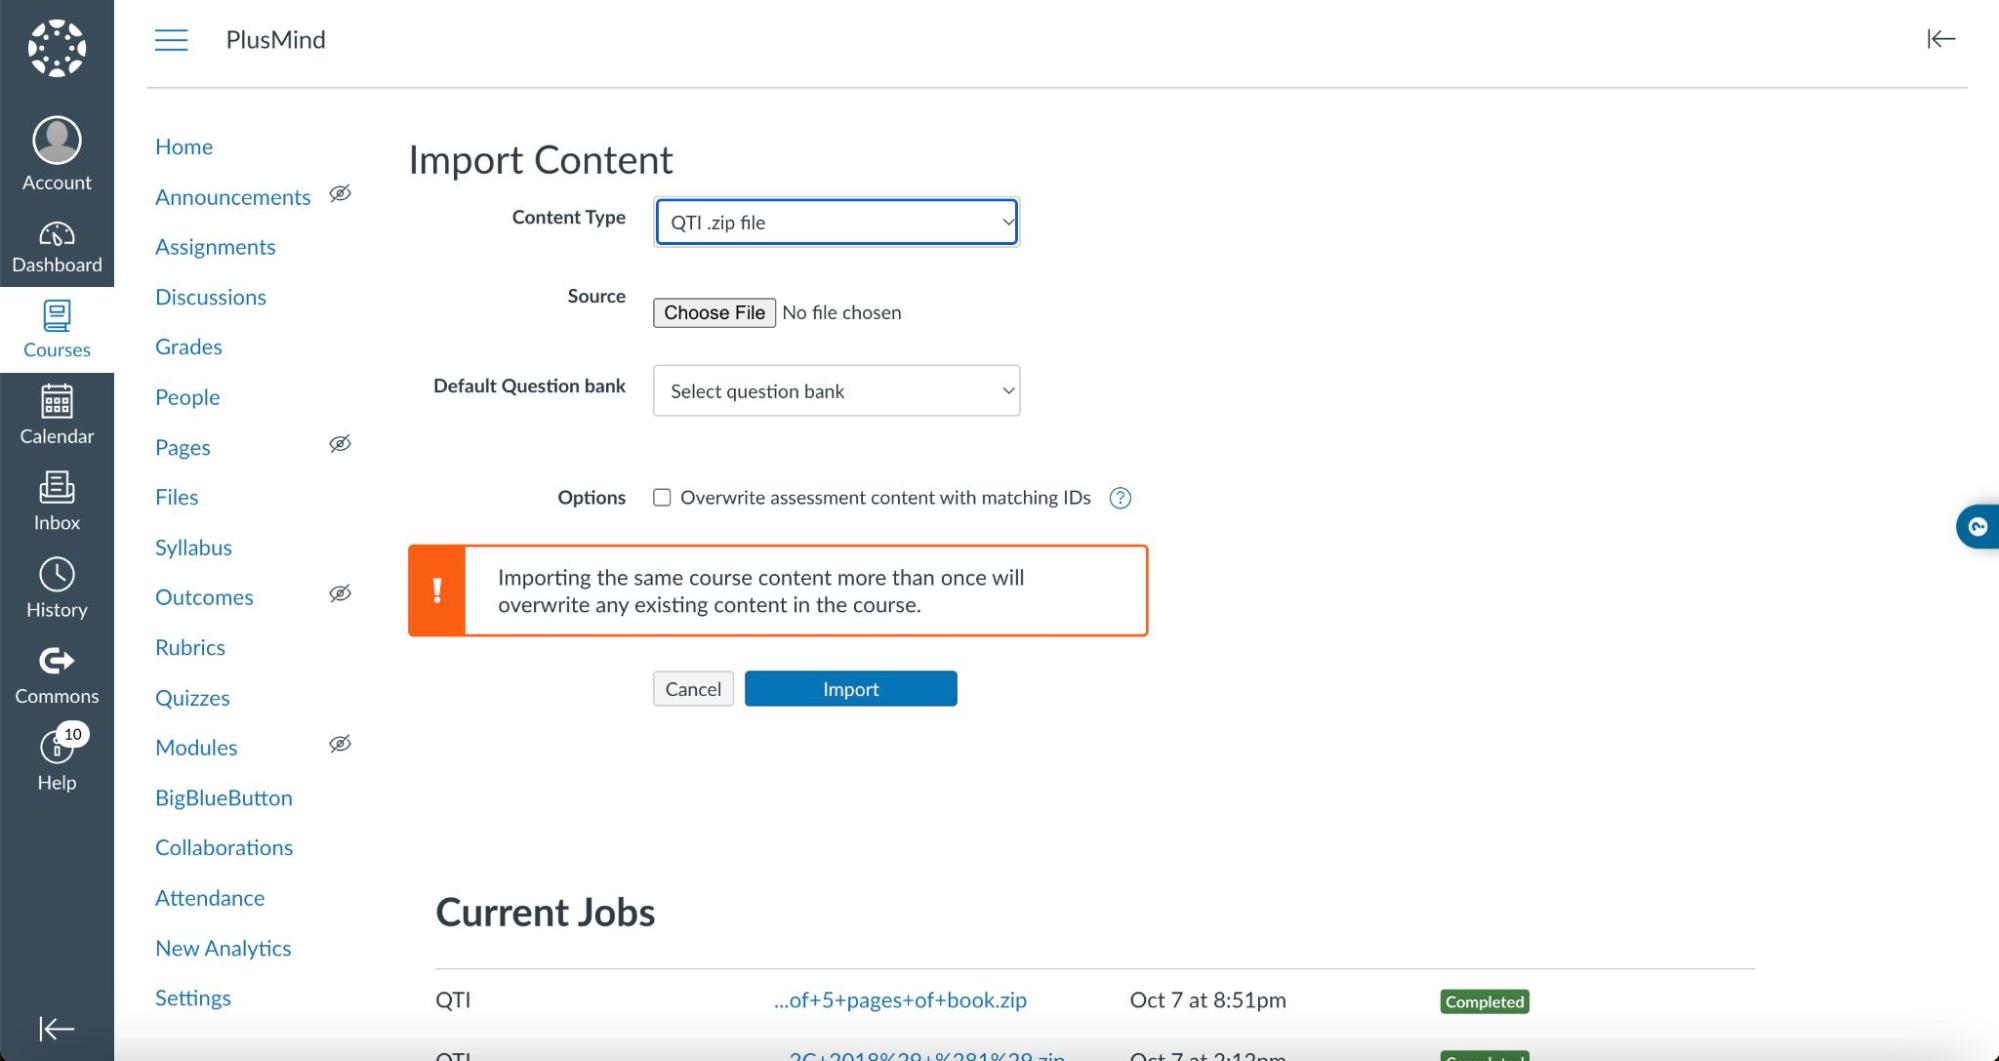
Step 4: Begin the Import Process
- Click the "Import" button.
-
Canvas will create a new question bank from your QTI .zip file. You'll
notice a progress bar indicating the import process.
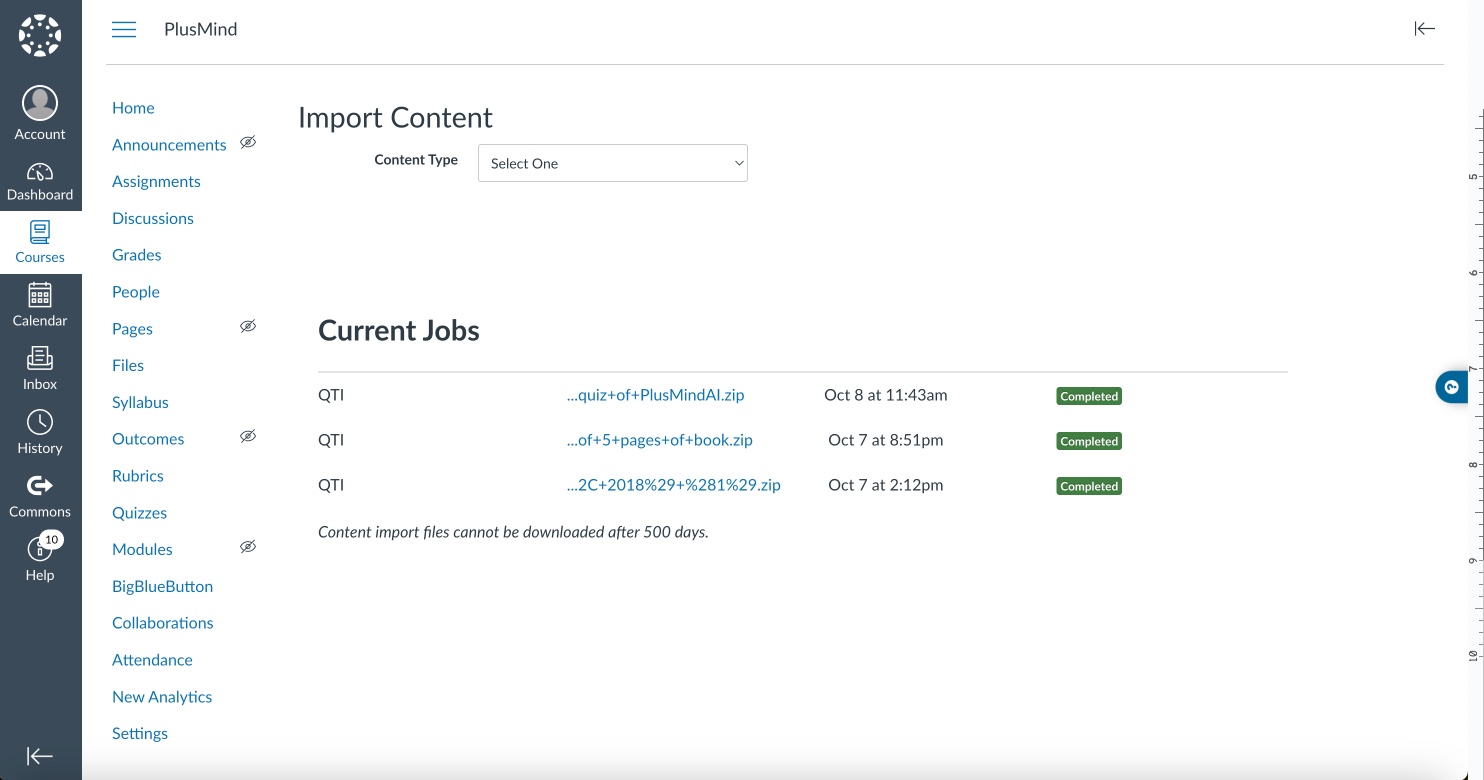
- Congratulations! You've successfully imported your QTI file as a quiz into Canvas.
Step 5: Verify Your Import
-
Click on "Quizzes" in the left menu sidebar.
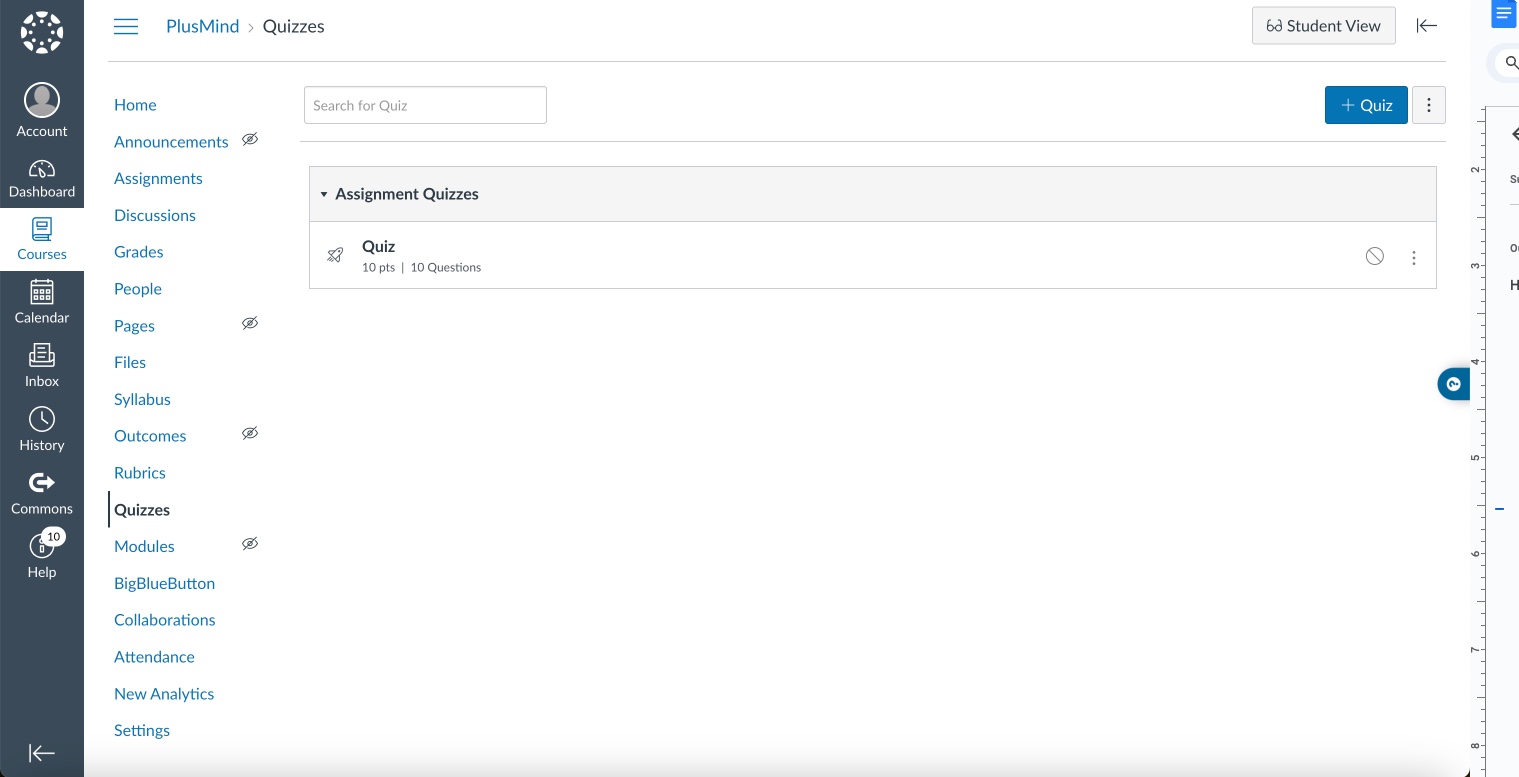
Step 6: Access the Imported Quiz
-
Under "Assignment Quizzes," locate and click on "Quiz."
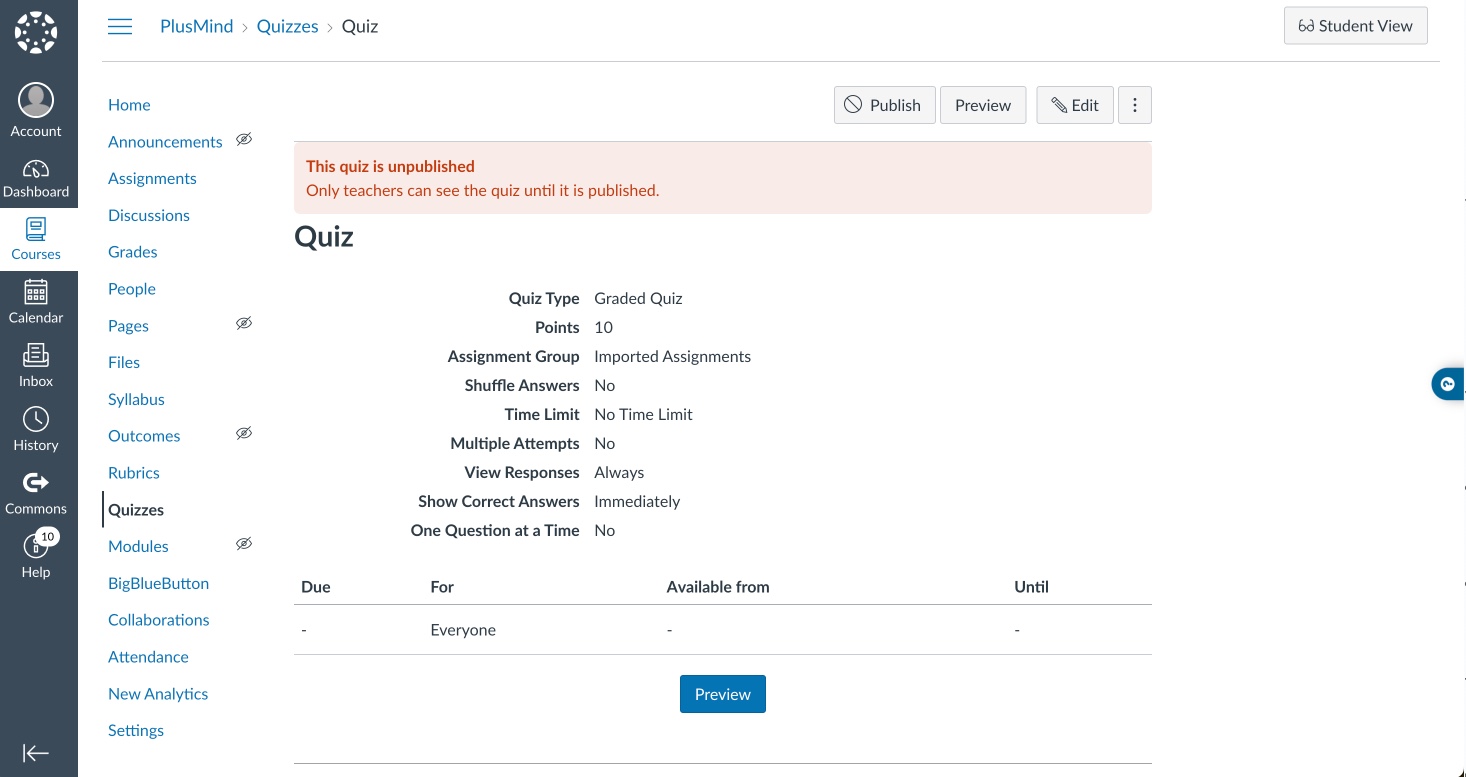
Step 7: Preview Your Questions
-
Once inside the quiz, click "Preview" to view the questions.
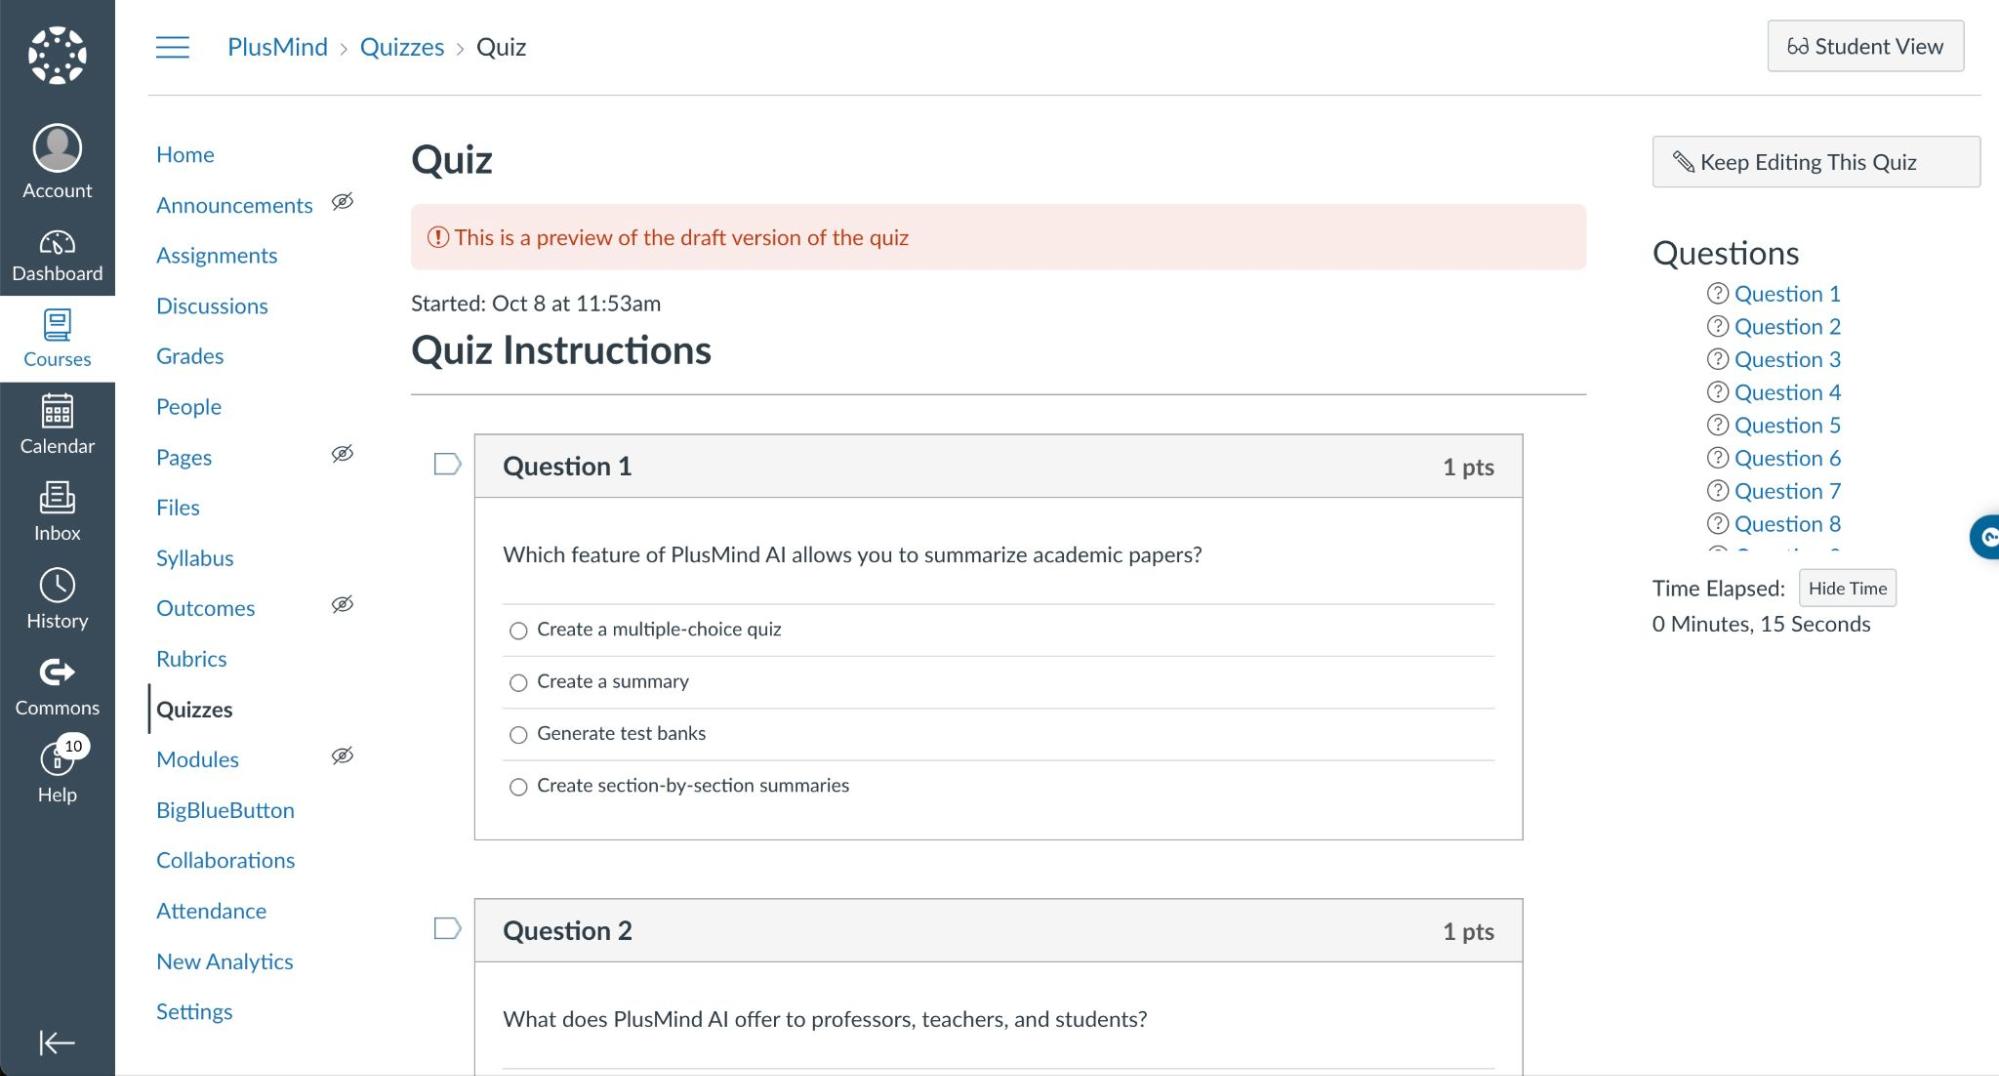
- And that's it! You have successfully imported and accessed your QTI questions within Canvas.